
The Slate Pages dashboard gives you visibility into all your record entries, whether you're storing maintenance records, inspection data, or even our Clean Slate health check entries. You have two ways to gain access to your record entries: List views, and exports. With list views, you can interact with your data right in the dashboard. Want to download your entries? No problem, just use the Export tool to generate a CSV, which can then be imported into your favorite spreadsheet application.
To get started, let's see how to view your entries right in the dashboard with List View.
Record Entry List Views
A list view allows you to view your data presented like a spreadsheet. You pick which 'columns' you want to see, and the dashboard will fill the rows with all of your data.
When configuring a list view to show record entries, each row in the table will be an entry on one of your slates, and the columns will be individual fields from those entries.
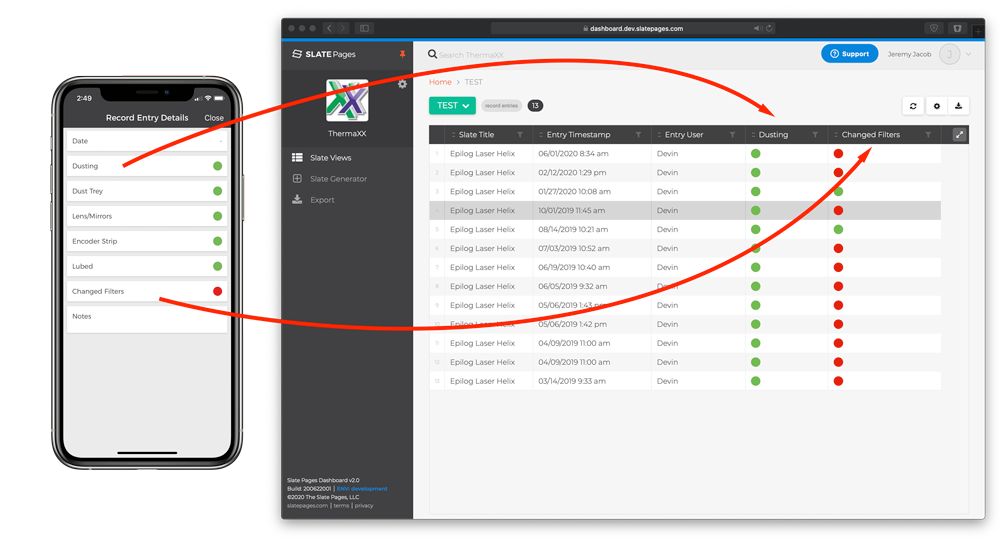 |
| The fields on your entries are displayed as columns of the list view. As shown above, the 'Dusting' and 'Changed Filters' fields become columns in this list view. Each row represents an entry. |
As you can see above, some additional information is shown for each entry. In addition to any columns you specify, you'll automatically get:
- The title of the slate that entry appears on, labeled Slate Title. This can be useful when you have the same records field on multiple slates. Tip: It helps to have a unique title for each of your slates, if you have more than one.
- The date and time the entry was added, labeled Entry Timestamp.
- The person that added the entry, labeled Entry User. Note that this will present the user's 'Display Name' that they configured for their profile.
All columns after these three are yours to choose.
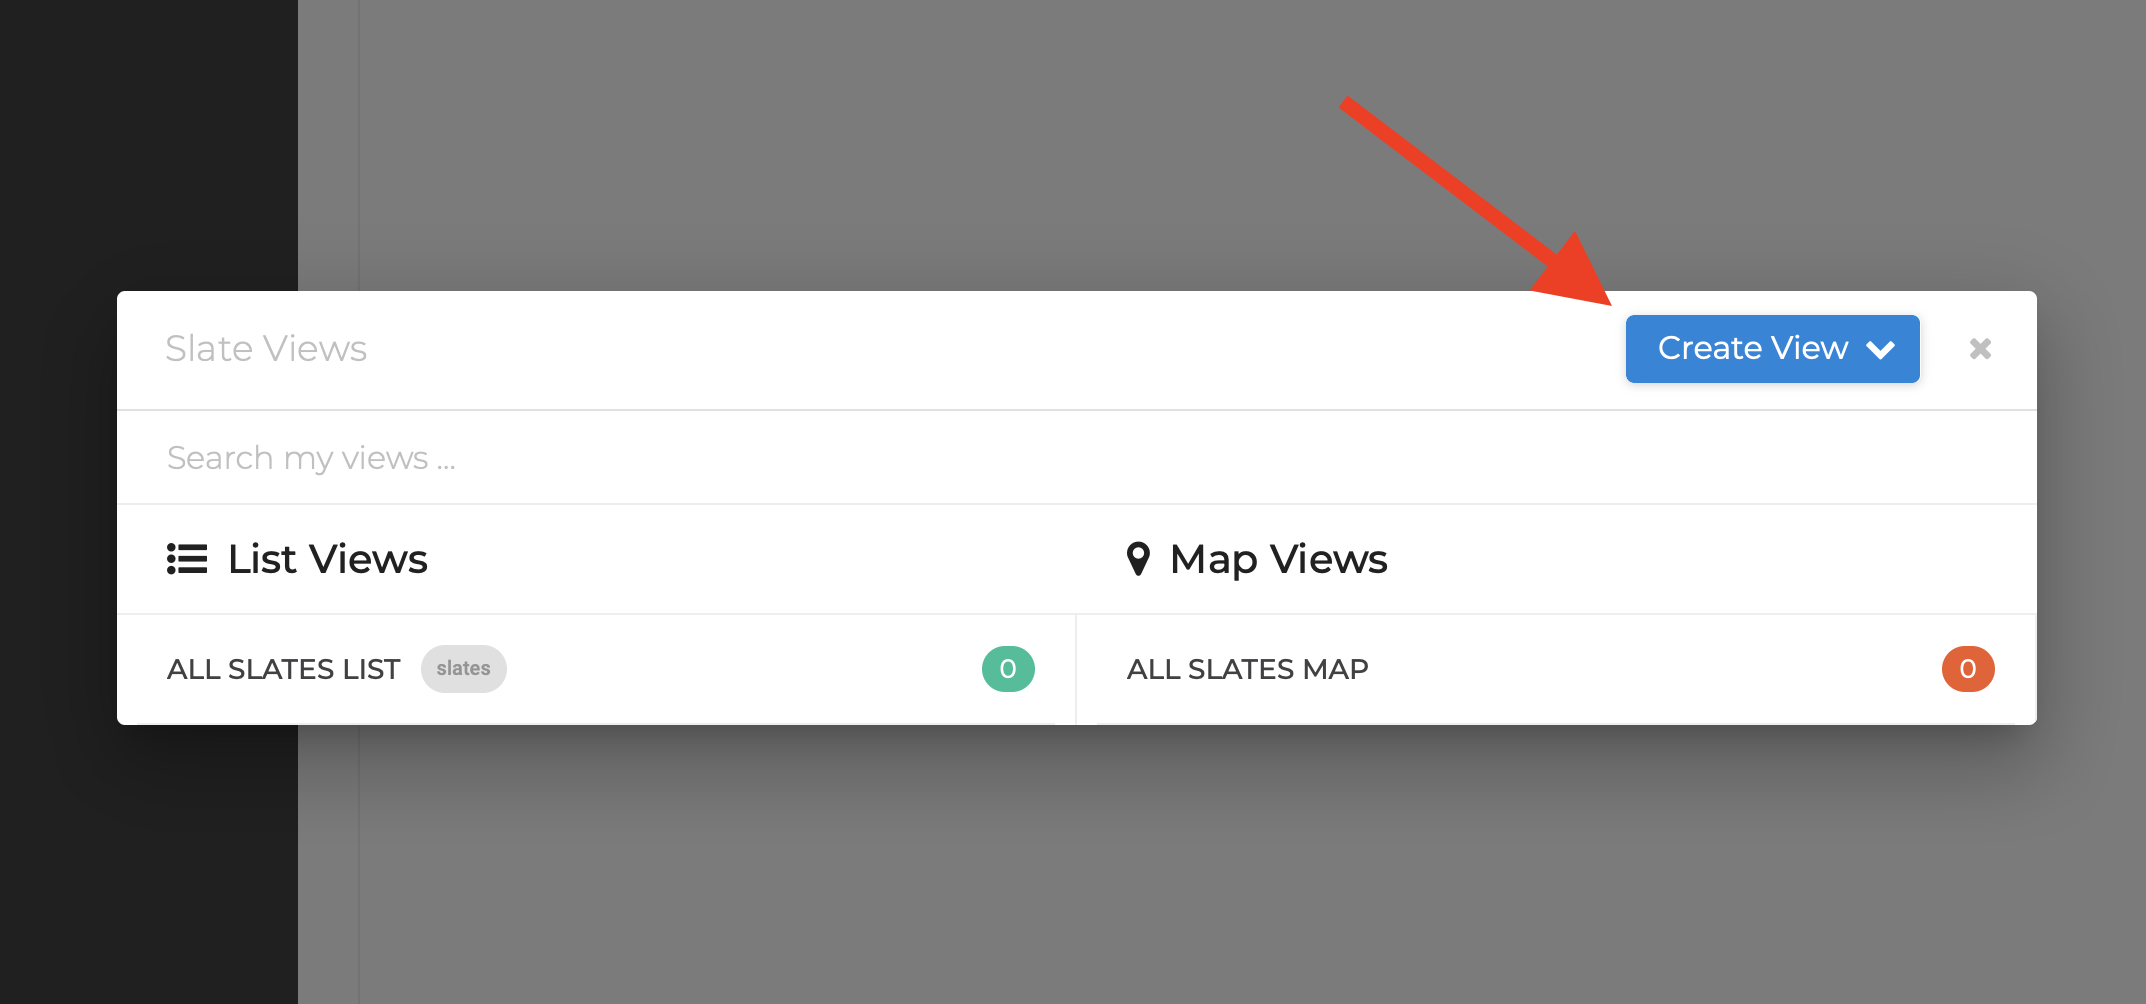
To create a new list view to see your record entries, start by creating a new list view.
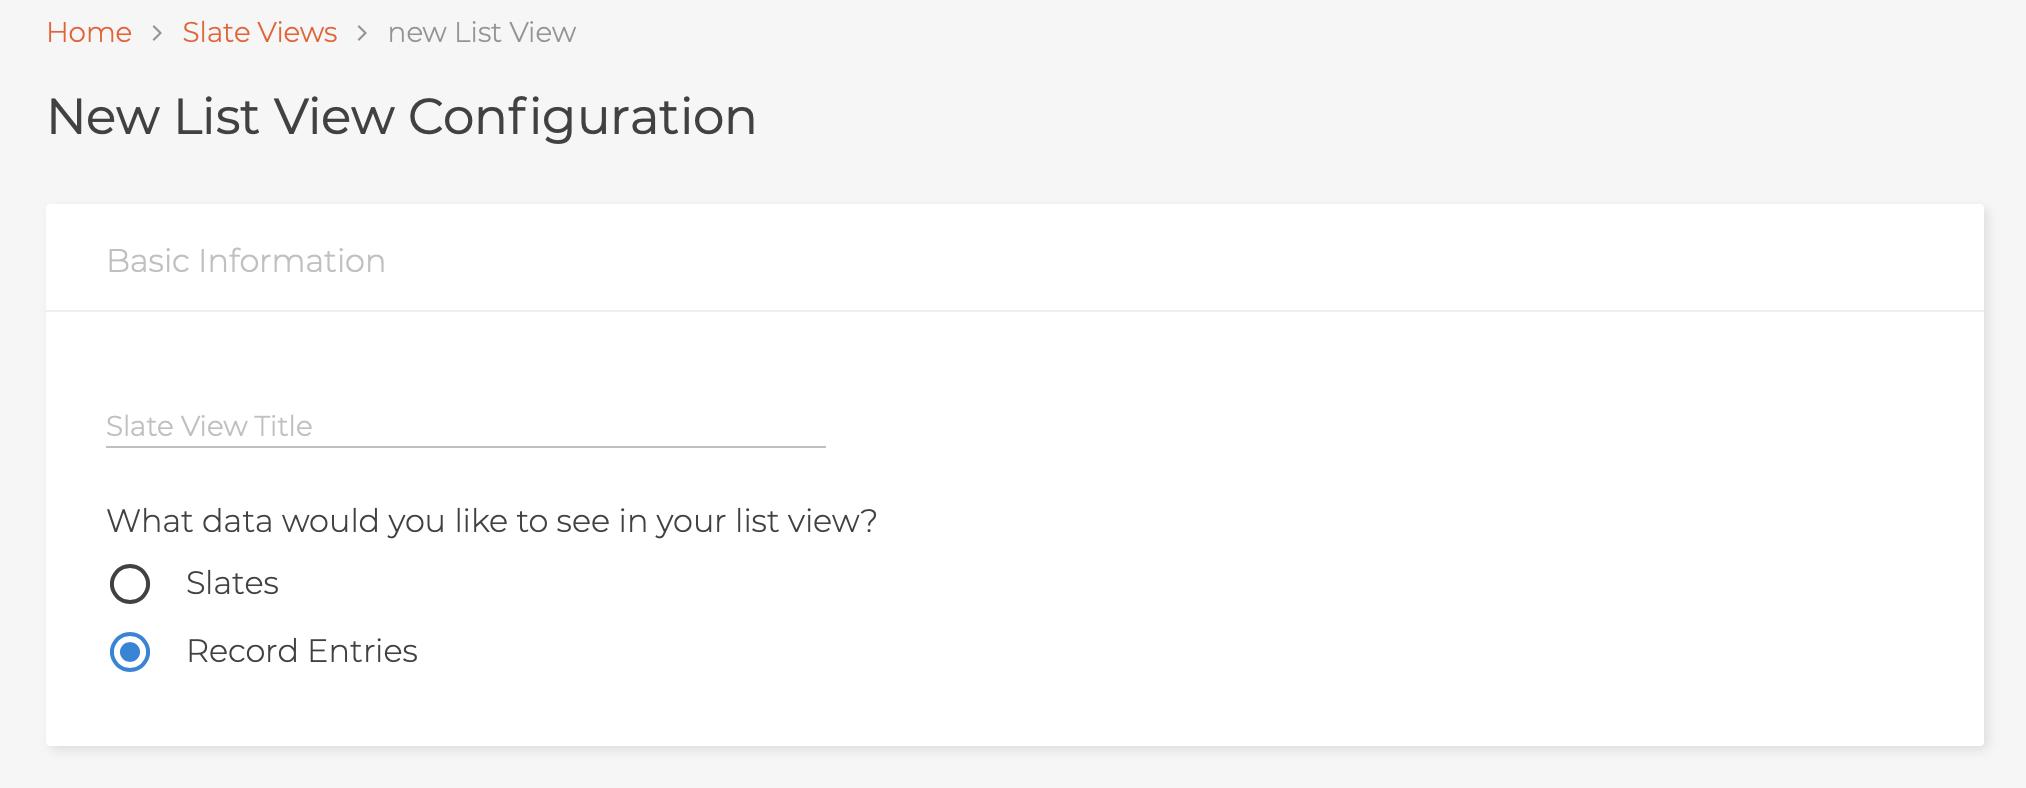
When configuring your list view, give it a title, and select Record Entries as the data type, as shown below.
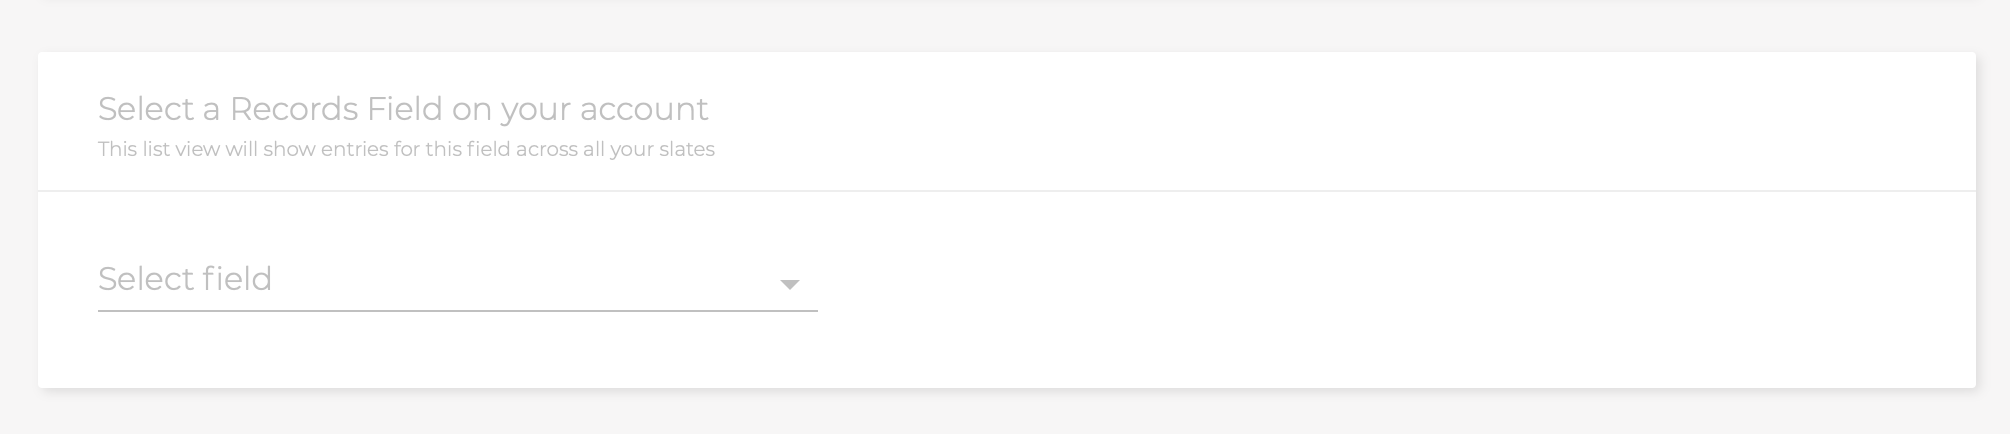
When you configure the list view for Record Entries, you're telling the dashboard that you want to see entries from one of your records fields, instead of your slates, so you'll need to pick the Records Field you want to view entries for.
Once you select which records field you want to use, the Available list will update to include only the fields that are on your entries. Now, you can select any of those fields to use as columns in your list view. To choose columns, select one or more fields from the left side by:
- double-clicking a field
- dragging a field from left side to right side
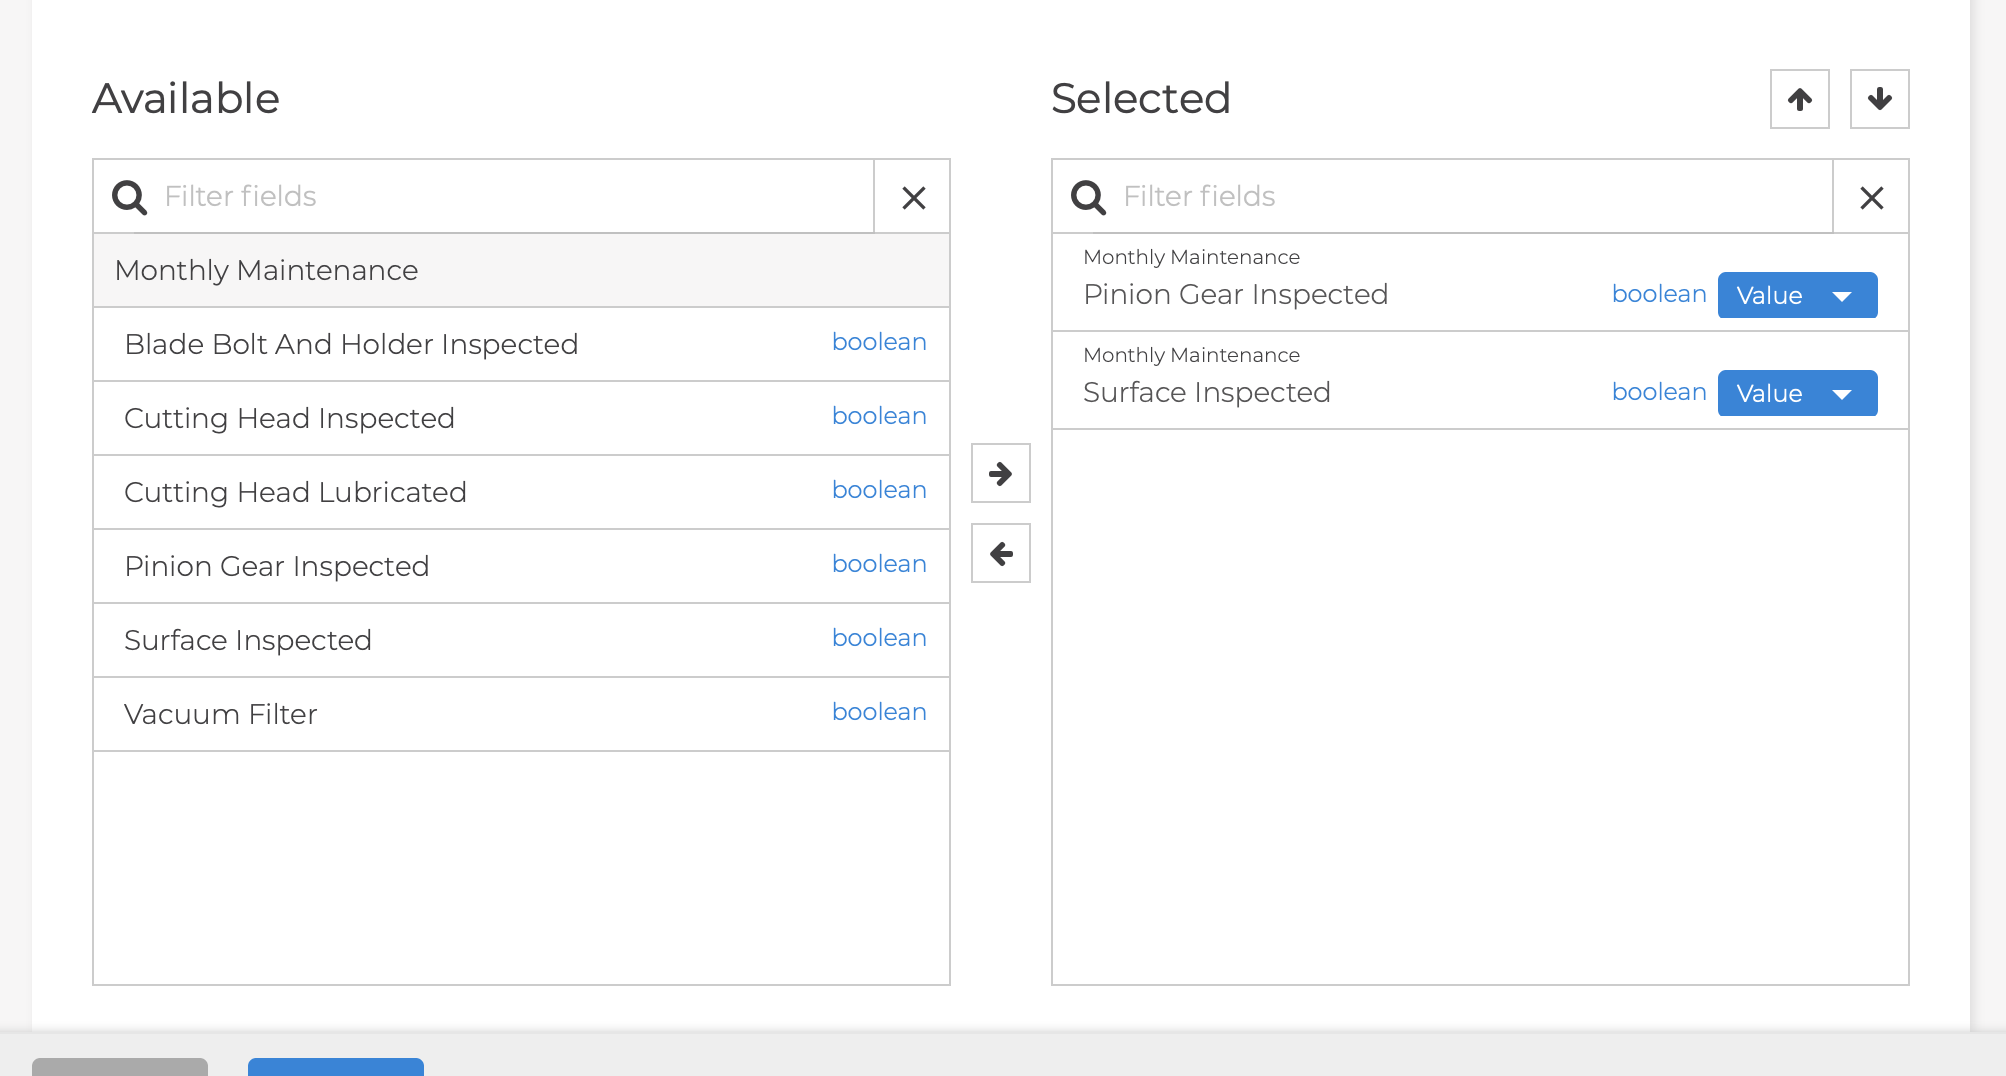
Once you have picked the fields you want, click save.
Exporting Record Entries
Exporting your record entries allows you to save your entry data to your desktop, to be used by the spreadsheet of your choice. You have two ways to generate an export:
1. From your List View - If you already have a list view configured for your record entries, and you want to export the same data, you can easily do so! Navigate to that list view, and click the Export button in the top-right corner.
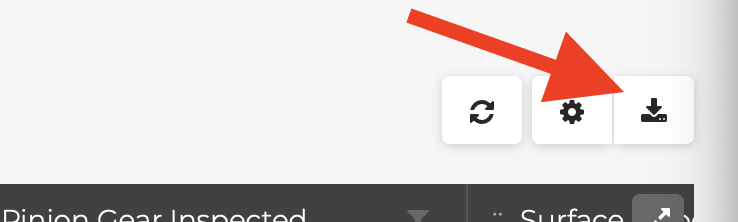
2. Manual Configuration - Of course, you can configure an export job from scratch. When you do, you'll find the same configuration options as the Record Entries List View configuration. To manually configure an export job, select Export in the navigation bar, and pick Create New Export Job in the top right.

Once you're done configuration your export job (either from a list view, or manually), select Save & Run at the bottom of the screen, and your export job will begin processing. Once complete, the Download CSV button will be enabled for the job.